The Dutch Braid Crown Hair Style
Source
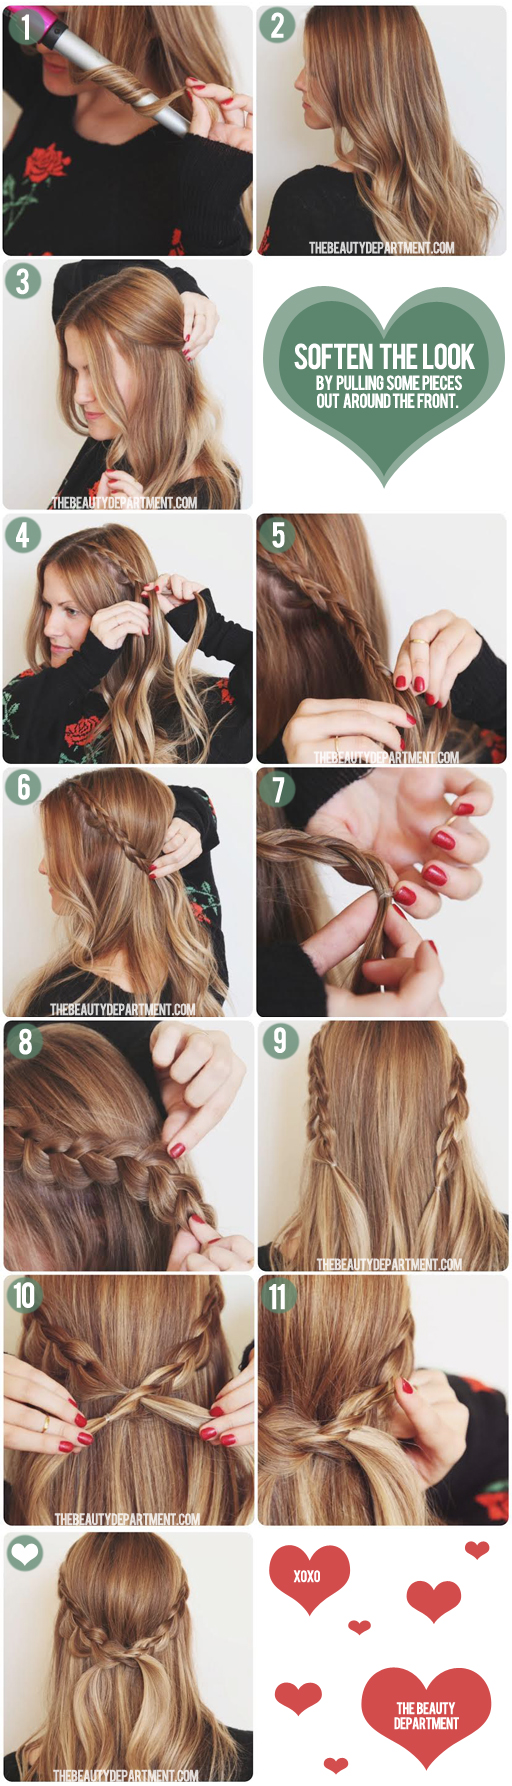
- Start with a little wave in your hair. We used this wand to
get perfect waves (bonus… that wand is wayyyy less expensive than most
and we love it!) If you already have natural wave, you’re good to go.
(Curly girls can do this as well! Just skip by #2)
- This is about the amount of wave you should have. Not too perfect, just quick, subtle waves.
- Pull half of your hair back where you imagine the braid going and
then gently pull some of your fringe/bang area out to soften the look.
Better to pull those pieces out now than once you’ve already braided
them in!
- Start the dutch braid from the part and going down toward your ear.
Don’t worry about scalp showing. We’ll take care of that in step 8.
- Once you get just above the ear, start doing a regular 3 strand braid.
- Make sure you braid it far enough so it will reach the back/middle
of your head. For this look, I wanted the hair to go under the occipital bone which
is that little bone on the back of your head. Right below it there’s a
curve and that’s where you’re going to want to secure this braid, so
make sure it reaches there.
- Now tie it off using a small clear elastic.
- Fatten up the braid by gently pulling it apart. Bulking up the braid will hide any unwanted scalp showing up front.
- Do exactly the same thing on the other side.
- Pull the braids together to meet in the back. Weave one of the braids through the other one.
- Pin it below the occipital bone using a couple of bobby pins.
No comments:
Post a Comment